How to create a bootable thumb drive with Rufus to install a program or operating system like Xubuntu / Ubuntu / Linux
The DVD I had to install Xubuntu wasn’t working. So I was forced to learn how to create a bootable thumb drive. Honestly, I avoided learning this forever because I thought it was going to be complicated. It’s not! Now, while I explain how to create a bootable thumb drive / USB for Xubuntu, these steps can be applied to any program you want to install.
Before installing Linux on your computer, you should note:
Installing Linux on a machine that’s pre-installed with Windows voids the factory warranty. Therefore, you should create a recovery USB right away. That way if you experience any problems, you can reinstall Windows without having to buy a reinstallation USB (~$70) from the manufacture.
In Windows, ask Cortana how to “create a recovery USB.” Your system will start the Recovery Drive and then ask you to insert a USB stick. It has to be 8 GB or more. The process takes about 30 minutes.
1. Download the ISO
a. Download a mirror from xubuntu.org/getxubuntu. I downloaded the amd64.iso one.
Here’s how the difference between amd64 and i386 was explained to me:
“Amd64 means you can use more than 3.25GB of RAM. I386 means you are limited to 3.25GB of RAM. For Linux, it’s recommended to use AMD64 (unless your computer is over 5 years old…).”
2. Burn the ISO to a thumb drive
Use Rufus (only works in Windows), or another free app like Unetbootin, to burn the ISO to the thumb drive. Since the title of this article is “How to create a thumb drive with Rufus” here’s how it’s done with, well, Rufus…
a. Download Rufus from https://rufus.akeo.ie. It’s free.
b. Insert your USB stick into the computer.
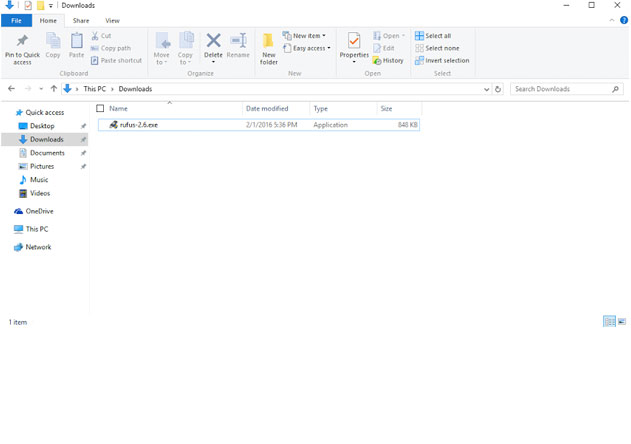
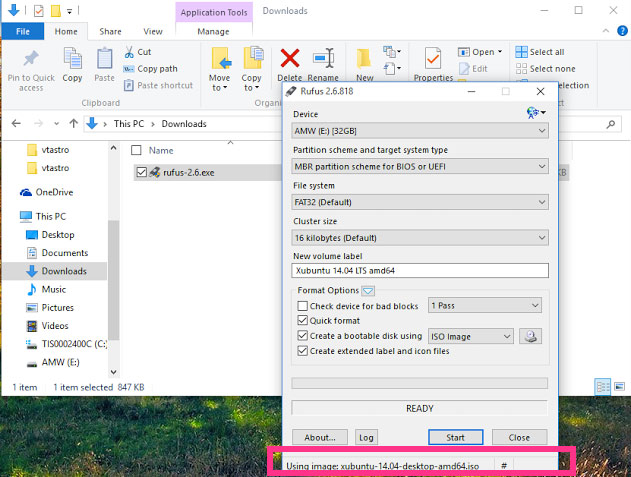
c. Double-click on the Rufus executable file. (rufus-2.5.exe in this example)
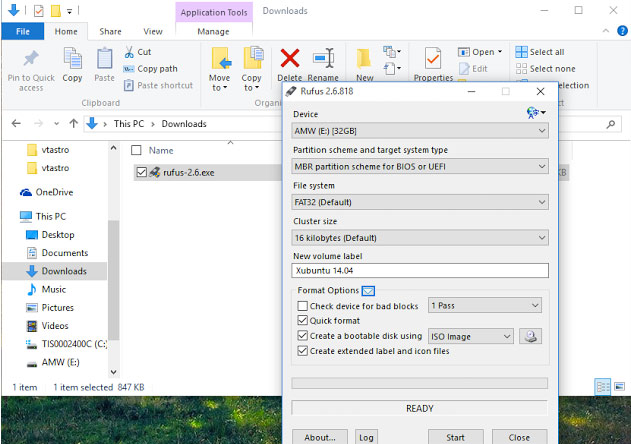
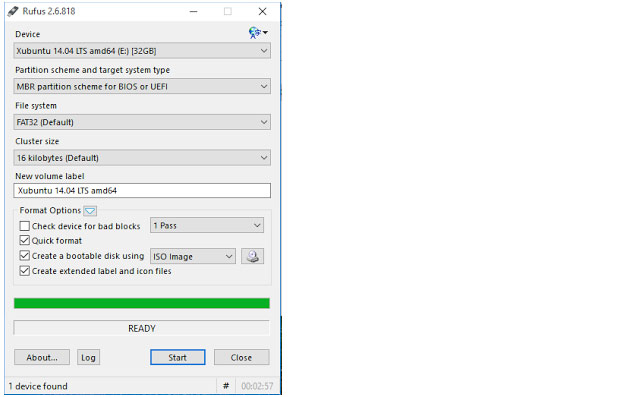
d. Rufus will populate the fields.
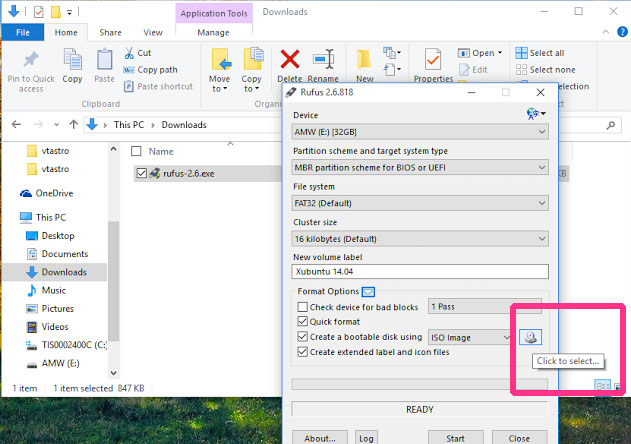
e. Click the bootable disk icon.
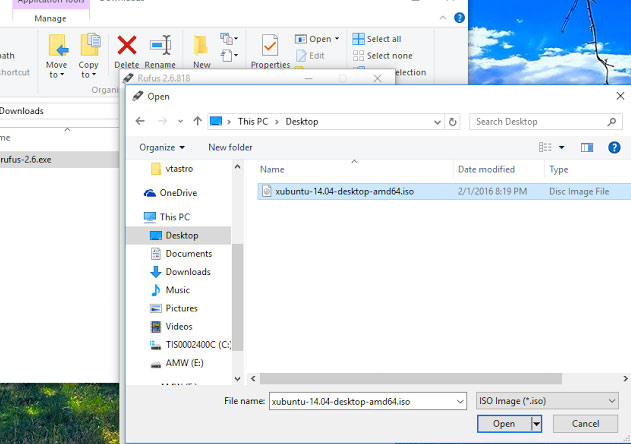
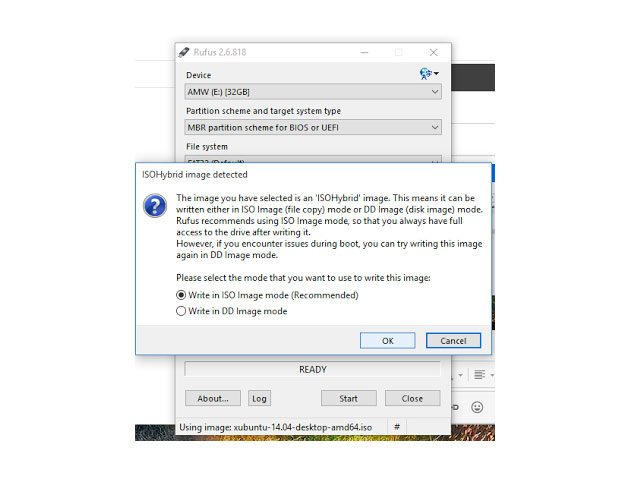
f. Select the Xubuntu ISO file and click Open.
g. Now we are ready to rock & roll. Click Start.
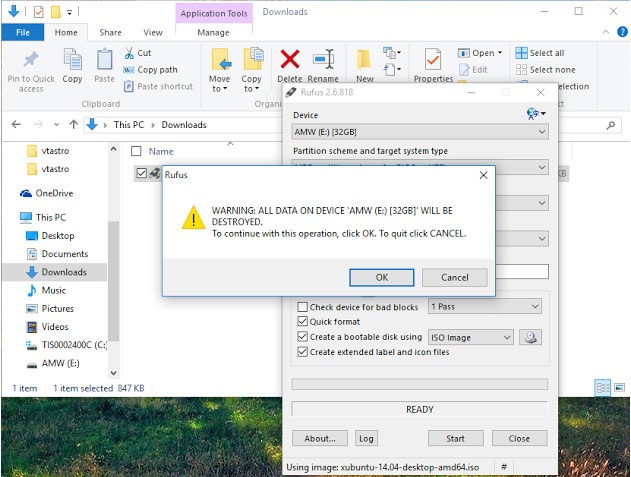
h. Click OK when this scary message appears.
i. Unless you have something special on your USB stick, click OK when this threatening message is displayed.
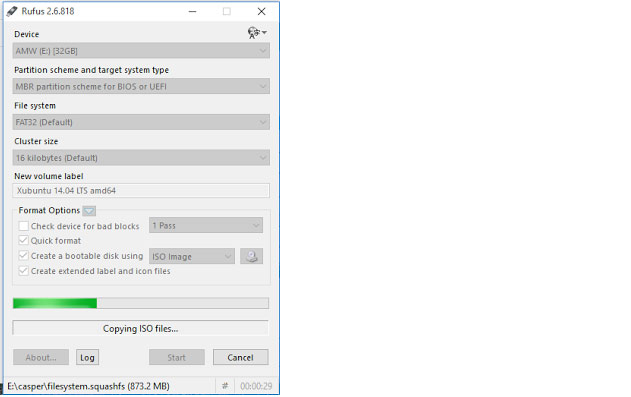
j. Kick it until Rufus is done doing its thing.
k. Move to step 3 once it’s done. It will say “Ready.”
3. Boot the computer from the thumb drive
a. With the USB in, turn on the computer and press F12. If F12 doesn’t work, try holding down the F2 key first and then power-on the computer. If that doesn’t work, Google “how to boot from a thumb drive.” Include the make and model of your computer.
b. Choose the option that says boot from USB and click enter.
4. Install Xubuntu
a. Arrow down to “Install Xubuntu” and press Enter.
That’s it! You are on your way to installing an awesome operating system!
extra somethin’-somethin’: Dual Boot Windows & Xubuntu
Here is an awesome website if you want step-by-step procedures on how to create a dual boot of Windows and Xubuntu: http://www.dedoimedo.com/computers/dual-boot-windows-7-xubuntu.html




Leave a Reply
Want to join the discussion?Feel free to contribute!